6 Steps to Perfect Low and Slow BBQ Cooking
Summer is here! That means one thing: barbecue. When most of us dig out our grill we dust it off and grill up some burgers and hot dogs, maybe some kebabs if we want a little veg with our food.
But have you ever wondered if there’s more you can do with your grill? The good news is there is; there’s a whole world of delicious recipes you can only truly achieve with your barbecue, and number one is low and slow cooking.
Low and slow cooking is big in the US and its popularity is spreading across the world. Why? Because it’s delicious! So, how do you cook low and slow at home?
What is low and slow cooking?
Low and slow cooking is simply the process of cooking food at a low temperature (the “low”) for a long time (the “slow”). While you can do low and slow cooking in the oven, cooking low and slow with a barbecue allows you to infuse it with a smoky flavour.
In most cases, low and slow cooking takes at least 3-4 hours of cooking, with larger cuts of meat taking up to 14 hours. By cooking your meat at a low temperature over a long time, you ensure even cooking throughout the meat, drawing out the best flavours without losing its moisture.
EDITORS CHOICE
How do I cook low and slow? 6 steps for perfect low and slow barbecue
Step 1: Use a quality barbecue
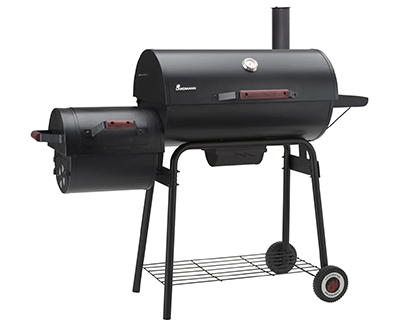
The first step is to get the right equipment, and that starts with your barbecue. You can get started with any barbecue with a lid (a lid is needed to keep your meat at the right temperature and ensure it is cooked evenly), but certain grills (often called smokers) are better than others.
The main thing to look for is something that suits your budget and maintains a consistent temperature with minimal babysitting.
Step 2: Choose a quality fuel
This step will be largely dictated by the type of grill you own, but keep in mind that your food will be infused with the flavour of any fuel you use, if it has one. Wood chips or pellets offer the best smoky flavour, but you can use charcoal, gas, or even electric grills if you prefer.
Step 3: Light naturally
Make sure you use natural firelighters when you cook low and slow. Starting with anything else risks tainting your food. You don’t want to cook for hours only to find you spoiled it in the first 20 minutes of cooking!
Step 4: Choose the right cut
For best results, choose a cut that carries more collagen than you’d choose for a normal barbecue, such as brisket and pork shoulder. These larger cuts are cheaper and will produce the best flavor as the collagen gradually breaks down, producing meat that’s succulent and bursting with flavour. You can find thousands of low and slow recipes online, so find something you’re excited to try (whether it be brisket, ribs, seafood, or vegetables) and gather what you need for the recipe.
Step 5: It’s called low and slow for a reason
You can’t rush low and slow cooking. A 1.8 kg brisket will take around six hours to cook, while a 3.6 kg bone-in shoulder of pork could easily take 10 hours or more at 110C. Plan ahead so you start cooking in good time so it’s ready to eat when you’re hungry.
If you have a barbecue with a thermostat that will add more fuel for you when the temperature starts to drop off (many gas grills and pellet grills will do this for you), you can walk away from the grill and do other things while your meat cooks, but grills without this feature will need frequent checking to ensure the temperature stays as consistent as possible.
Step 6: Check the temperature and let it rest
A meat temperature probe is an essential tool – you need it to ensure your meat has reached the correct internal temperature and is safe and ready to eat. These probes are inexpensive and easy to find; some sophisticated barbecues even have them built-in.
“Resting” your meat is essentially putting it aside to cool for a while before serving. Allowing the meat to rest allows the juices and flavours to settle in the meat as it cools, rather than running out onto the plate as it’s cut. Most recipes will advise you on how long to rest your meat, but generally, you want to rest your meat for at least 15 minutes, but you can rest it for up to 45 minutes for a whole turkey.
Step 6: Enjoy!
When it’s finished resting, it’s time to eat! Simply serve and enjoy.


